Aug 29 2006
Charlie Hind Sweet Potato – A Work In Progress
I can admit that I’ve always been a fan of ocarinas and, more specifically, sweet potatos. They have a sweet warm mellow tone, feel wonderful in the hand, and are easily portable. I’ve been preparing for a large scale recording that will use, primarily, acoustic instruments and have been aquiring instruments that have unique or interesting tonalities.
A while back I purchased an old Gretsch plastic sweet potato and, although it has a wonderful nostalgia to it, it doesn’t sound or play very well. While poking around on Ebay, I discovered a fellow by the name of Charlie Hind who hand builds wooden ocarinas and sweet potatos. His work, which can be seen on his web site, is really beautiful. He works, mostly, in walnut, a wood that I’m really fond of. In exploring his site, I noticed that he’d created a few instruments in mahogany, and I remembered that I had a rather large piece left over from my guitar project. I emailed him and asked if he’d be willing to work with my wood, and he said yes.
Charlie has been more than kind. He’s been photographing the process of creating the instrument for me, and has allowed me to post his pix here.
I’ll also include some of his comments.
Hi Sander,
The process will take a couple of weeks, however I have a 4 day show in early September that will probably interrupt it. What is the humidity like in California? It has been in the 90% range here lately, but my shop is air conditioned and stays a lot drier than that. After I cut the wood apart, I should let it acclaimate to my shop environment for a couple of days. Then I will dress it down flat so that no stresses are built into the instrument.
Personally, I don’t mind open pores in Mahogany or other woods. The Padauk I use has HUGE pores, and I leave them open. I just consider it a natural charactistic of the wood. If you don’t object, I will use several coats of oil and leave the pores open. I use Minwax Antique Oil Finish. It has dryers and hardeners in it, so it produces a rock hard finish.
Thanks for your descriptions of how the wood works. After the heavy duty resawing, I use primarily a router, dremel tool, files, and sandpaper. If the wood cups after resawing, I will run it over the jointer to flatten it. That could be a problem with that wild figure. We’ll just hope it stays flat.
Thanks again,
Charlie
Hi Sander,
The Mahogany arrived this afternoon. The first thing I noticed is that the grain is running the wrong way. The piece is 14″ wide rather than 14 long. I had just assumed it was 8″ wide and that you had used two pieces jointed in the middle for your guitar.
I’m disappointed because the grain really needs to run the length of the ocarina, not across the width. All is not lost; I can still run the grain the right way, but it won’t appear bookmatched along the center joint. It is not something that anyone else would notice, but it isn’t what I would have preferred. This will be the best I can do with the odd shape of this board.
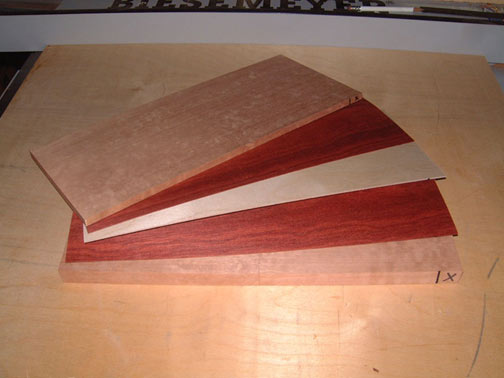
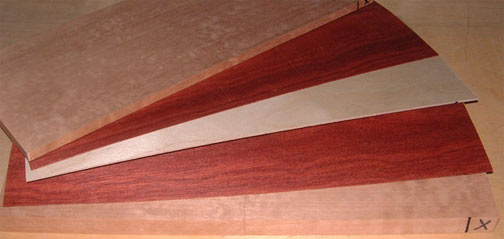
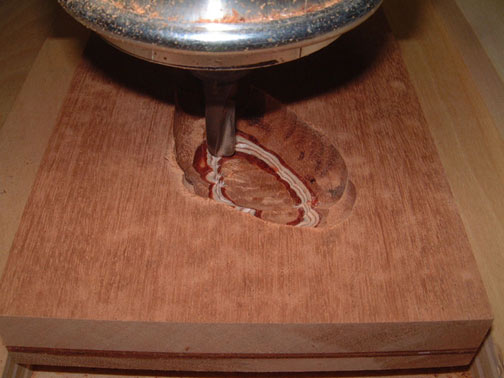
I have cut the piece into two boards 6″ wide x 7″ long with the grain running the right way. Tomorrow I will start resawing and hopefully gluing back together with the accent pieces I have chosen. The wood seems very dry and stable, so I don’t see any reason to wait, if everything stays reasonably flat.
Best regards,
Charlie
Hi Sander,
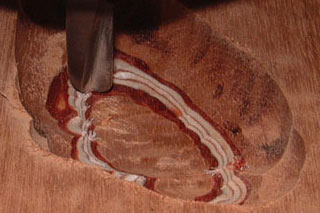
I’m glad you like it so far and are enjoying the pictures. The light colored wood is actually 3 layers of Birch veneer. I used it since you had originally said you liked #59…which had five layers of Birch. I sandwiched the Birch between two layers of Bloodwood veneer. It has a rich red color that goes well with the Birch and Mahogany.
This is the first time I’ve used the Bloodwood. I’ve been wanting to try it and just bought a few pieces recently. Your wood came at just the right time.
Yes, it’s ok to put these pictures on your blog. There were times when I thought of taking a picture, but I just didn’t feel like stopping to set up for it. Although these pictures won’t show the entire process, they should give a pretty good overview of what went into it.
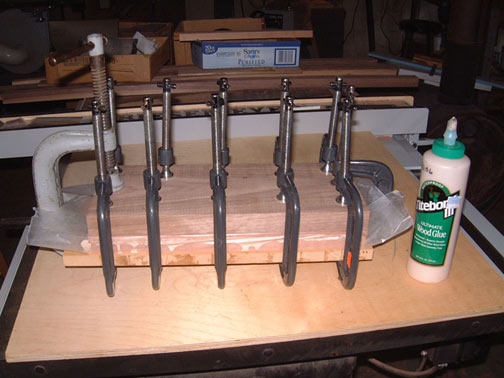
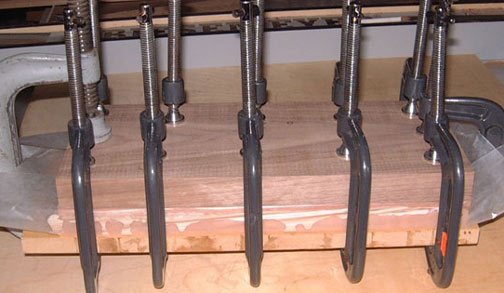
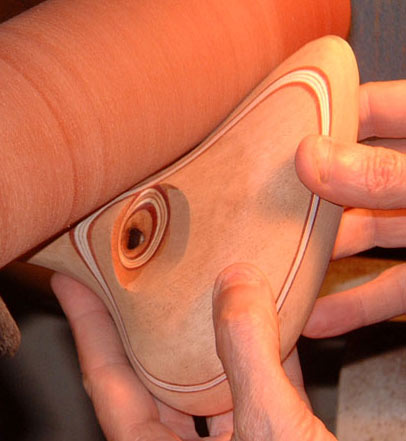
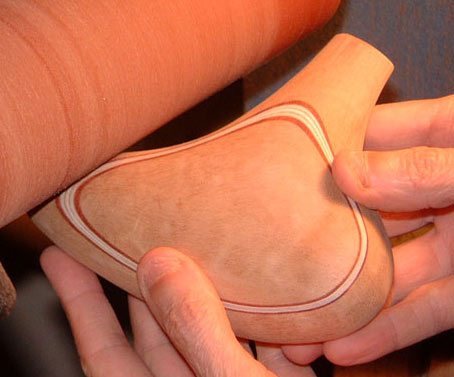
I worked on your ocarina all weekend and have it glued together and the outside shaped. Attached are a couple more pictures.
Thanks,
Charlie
…and one last note from Charilie:
Hi Sander,
I’m also amazed that the ocarina got there so quickly, and I’m glad you are happy with it. I had forgotten that Monday is Labor Day, so I’m especially glad it got there early.
I took the sanding down to 1500 grit. I have a rubber covered drum sander that holds regular sheets of sandpaper. The drum turns at 1800 rpm. The fresh paper sands out the scratches from previous grits, but when it gets worn it starts to burnish the surface. It might have partially filled the pores with fine dust/oil. Maybe that’s why the pores aren’t as noticeable as you expected. I sanded it this way, then put on a coat of the Minwax oil. After it was dry, then I sanded it again with a fresh sheet of 1500 grit paper…then oiled it again. When I did the final sanding(burnishing), the paper was so slick that it felt like a leather strop for sharpening a razor. This generates a lot of heat and makes the surface glass-like. When finished, I applied carnauba wax with 0000 steel wool. I reapplied the wax 2-3 times.
Thanks again for your order. I enjoyed working with your wood, and I’m glad the ocarina has an appreciative home.
Best wishes,
Charlie
The 1st thing I noticed was the incredibly high level of artistic craftsmanship that this man is putting into your project. It is surpassed only by the incredibly high level of nailbiting he engages in. I thought I was bad………..
Your pal, Mikey
[…] concented to working with my wood, even though it caused him a few minor challenges. Check out the photos of the instrument as it is being made. Here are two of the final competed […]